Showing posts with label Small Blooming Poinsettia. Show all posts

Monday, December 30, 2013

Holiday Park - 30 December 2013 Post to Poppystamps Design Team Blog

12/30/2013

Thursday, December 26, 2013

Church Window for Poppystamps

Church Window

Happy Holidays to all!  My December posts for Poppystamps are after Christmas has come and gone but I hope you will still enjoy my church window card.  
I created a double window for this card so that it has a window inside and outside of the card.
The first image shows the outside of the card.  I created a stained glass effect by applying adhesive to vellum and then using a fine glitter.  Then I affixed the Grand Gothic Iron Works window that I cut out of a pearlized white paper.  Once it dried, I colored the reverse side (non-glitter) with markers.
Outsidewindow
  Signature
Next, I cut the Grand Gothic Iron Work Window a second time from the base of the cardstock.
And then I cut the Grand Gothic Window (frame) twice out of pearlized white cardstock.
Then, I took a second piece of cut vellum and applied Adhesive, Glitter, and the Iron Work Window cut from the blue base.  After allowing to dry I glued the two sections together. 
While that dried I glued the window frame to the front of the card and then placed the "sandwich" of vellum inside before adhering the second window frame inside.
After this I cut another white piece of cardstock and stamped the greeting, cut several pine sprigs and poinsettia leaves before building the flowers and adhering to the front of the card.
As you can see from the shot below (of the inside) it is much darker looking than the image above which is because there is no light source behind it.  The image above I took with the card open and a lamp behind it.
This card can be adapted for a first communion, baptism, Easter or even a sympathy card.
Hope you liked it.

InsideWindow1226

Signature
 
Supplies you will need:
CS305B - Merry Little Christmas Cling Stamp
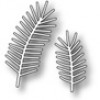
936 - Pine Sprigs Die
902 - Small Blooming Poinsettia Die
845 - Gothic Grand Window Die
850 - Grand Gothic Iron Work Window
Glitter, Markers and Adhesive, Vellum Paper
 Here is hoping that your holidays are full of happiness and love.  
Thank you for visiting Poppystamps blog and my blog as well.
Best wishes for a bright and healthy New Year,
Kimberly WM copy


Friday, November 15, 2013

Christmas Luminary

Christmas Luminary

For my posting today, I chose to make a Christmas luminary.  I did not provide dimensions just some general guidelines as you can easily size this up or down to your liking.
Oct18AMV2
Signature

Supplies you will need:
Poppystamps Winterflake Frame [905]
Poppystamps Small Blooming Poinsettia [902]
Cardstock
Adhesives
Flameless battery-powered tea light
Embellishments
This is relatively easy to reproduce and customize.  For my luminary I began with an 8 1/2" x 11" piece of cardstock.  There are a couple of key considerations here.  Do you want a bottom of the luminary or just one that will sit over a battery-powered flameless candle?
For the luminary, determine your desired dimensions.  You will want two wide sides and two narrow sides (to mimic a paper bag).  Score where you wish them to fold but on the last side make sure you have a little extra that you can score and use to adhere the sides together.
My luminary is about 7" tall and my front and back panels are about 3" wide with my side panels a little over 2" inches wide (plus a little extra to adhere on the last panel).  I cut two sheets of vellum the size of my wide panels.  Then I cut ovals into my wide panels. I used glue dots to adhere the vellum to the inside of the luminary before assembling.
Next, I cut out the Small Blooming Poinsettia [902]  and the Winterflake Frame [905] dies from Poppystamps.  I trimmed the Winterflake Frame [905] by cutting out the middle section of the frame and formed the ends around my ovals.  Next I assembled several layers of the Small Blooming Poinsettia [902] and adhered to the vellum with a couple of glue dots.  
You can choose to repeat design on the back panel of the luminary, forgo the back panel (and not cut it out so it is solid) or use a different design.  You can also simply cut shapes such as the Giovanni Snowflake and let the light shine through.
I used miniature tea battery-powered tealights (never use an open flame) to create the flickering light inside which are found at most craft stores.  You can get as fancy as you'd like with ribbon, glitter or other embellisments as well.
Oct18AMV1
Have a great day and thanks for stopping by!  
Kimberly WM copy
You can find all the great Poppystamps dies used to create this luminary (and many other projects) by following the links below:

Saturday, September 7, 2013

Merry - My latest Poppystamps Design team posted on 9/7

Merry
The new Poppystamps dies are amazing!  For this post, I wanted to showcase the versatility of the Merry Dots die new from Poppystamps.


These three cards, each use the Merry Dots die, in different positions.  

The cards are each 3" x 3" and were designed to be used as in lieu of a tag to accompany a holiday gift. Each card uses the Poppystamps cling stamp "Have yourself a Merry Little Christmas" stamped inside on a white piece of cardstock.

To create the cards measure a piece of cardstock to 6" long and 3" wide.  
Score lengthwise at the 3" mark.  
Next determine where you want the fold.  The deer and the candle cards each have the fold at the top.  The green sleigh card has the fold on the left.  With the card in an unfolded position the Poppystamps Merry Dots die and run it through your cutting machine.  
If you wish to have a color showing through (deer card) then cut a different color of cardstock and adhere to the inside of the card.  Then chose a color for the inside to stamp your greeting.  
Now comes the fun --decorate the outside of your card.  The hardest part is choosing from all the exciting new Poppystamps dies.  What will you create?
Supplies I used for these cards:
Merry Dots [#937] 
Birthday Candles [#909] 
Woodland Fawn [#945]
Santa's Magic Sleigh [#943]
Small Blooming Poinsettia [#902]
Little Christmas Cling Stamp [CS305B]
Cardstock

Miscellaneous Supplies:
Adhesive- I used a liquid glue and glue pen for these cards.
Red Glitter Glue - For the candle card, I cut two sets of candles and cut the tips off to make the yellow look like a flame.  Then I applied a red glitter glue to make it look more like a flickering candle.
Rhinestones - added a bit of bling to the center of the poinsettias on the sleigh and deer card.
Ink - for stamping the greeting inside of the card.